
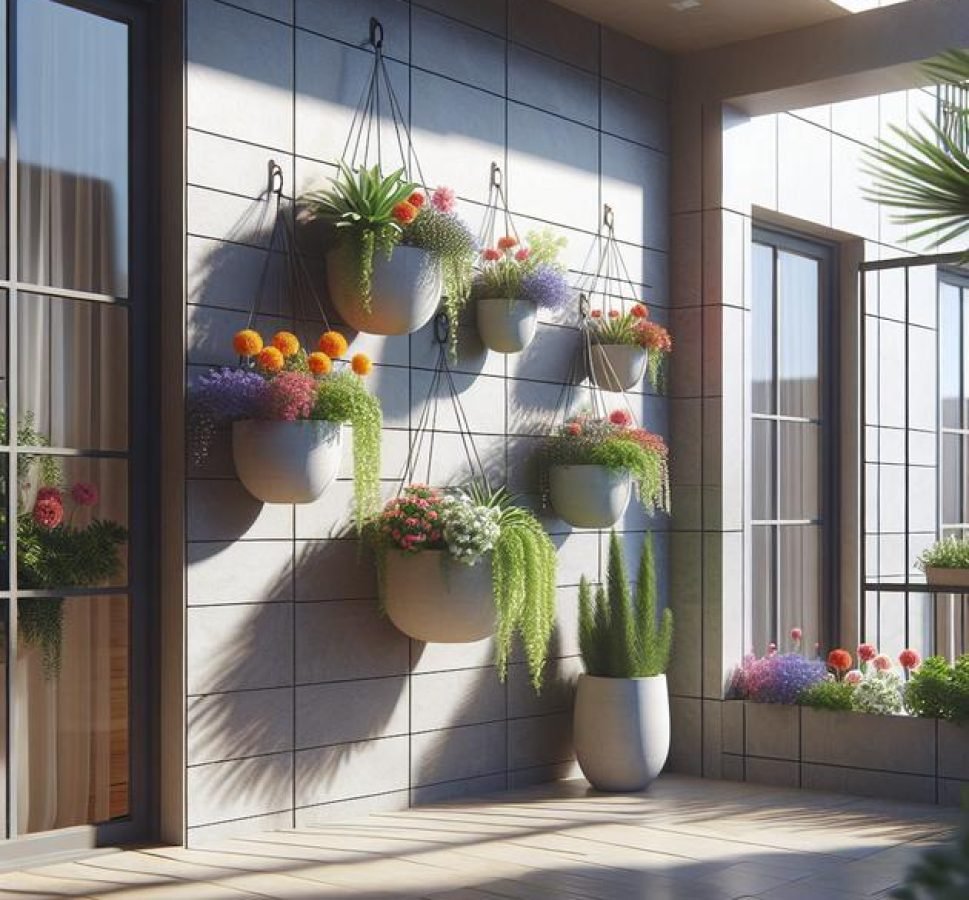
DIY window box planters enhance your home by creatively combining colorful and seasonal plants with efficient materials, ensuring proper sunlight, drainage, and maintenance to promote vibrant growth and aesthetic charm.
Diy window box planters can add a touch of elegance to any home. Imagine looking out your window and seeing a cascade of vibrant colors, all thanks to your own handiwork. Wondering how to start? Let’s dive into some of the most creative and manageable ideas you can implement right away.
choosing the right size for your window box
Selecting the ideal size for your window box is crucial to ensuring both aesthetic appeal and plant health. Start by measuring your window space. It’s important that the box fits comfortably and complements the architecture of your home.
Consider the depth and width necessary to accommodate the root systems of your chosen plants. A deeper and wider box allows for better soil volume and root growth, which is vital for healthy plants.
Smaller window boxes are perfect for herbs and small flowers, while larger ones can house a mix of flora, creating a lush, overflowing effect. Remember, the weight of the box when filled with soil and plants must be supported by the window frame, so choose materials accordingly.
Ultimately, the right size will depend on your local climate, the types of plants you wish to grow, and the visual effect you’re aiming to create. Take time to plan before purchasing or building your window box.
materials needed for diy window boxes
Creating DIY window boxes requires a selection of materials that balance durability and aesthetics. Begin with choosing the right type of wood or material such as cedar, which is naturally resistant to water and rot. For a modern touch, consider using metal or PVC options.
Next, you’ll need screws or nails designed for outdoor use to secure the boxes together. A quality wood adhesive can provide additional support, ensuring your box withstands various weather conditions.
Don’t forget about drainage. Drill adequate holes in the bottom of the box or use inserts to facilitate proper water drainage, essential for plant health.
Finally, choose a weather-resistant sealant or paint to protect the exterior of your window box. This finish not only safeguards against elements but also lets you add a personal color touch that matches your home’s design.
how to choose the perfect flowers

Choosing the perfect flowers for your window box requires considering factors such as sunlight, color scheme, and plant compatibility. Start by assessing the light conditions where your window box will be placed. If it receives full sun, opt for sun-loving plants like geraniums or petunias. For shaded areas, prefer shade-tolerant options like impatiens or fuchsias.
Think about the colors you want to display. You can opt for a harmonious palette by selecting blooms in shades of the same color, or go for a vivid contrast by mixing complementary hues. Mix textures with a combination of flowers and foliage plants to add visual interest and depth.
Also, consider the bloom time of your chosen plants. Select varieties that bloom at different times to maintain continuous color throughout the season. Lastly, ensure plant compatibility; some plants compete for resources and can crowd each other out.
seasonal plant recommendations
Selecting seasonal plants for your window box ensures vibrant displays year-round. In spring, opt for fresh blooms like pansies and daffodils that thrive in the gentle sunlight and cooler temperatures. As summer arrives, switch to heat-tolerant choices such as marigolds and geraniums that can bask in the warm sun.
For fall, consider chrysanthemums and ornamental cabbages to bring rich color and texture. These plants thrive in cooler weather and provide a striking balance to your display. In winter, evergreen options like dwarf spruces and holly add greenery when flowers are sparse.
By rotating your plants seasonally, you not only maximize the visual impact of your window box but also cater to the specific needs of each plant type, ensuring healthy growth and prolonged beauty throughout the year.
maintaining your window box plants
Proper maintenance is key to keeping your window box plants lush and healthy. Start by ensuring they receive adequate water. Check soil moisture regularly, especially during hot weather, to prevent plants from drying out.
Fertilizing is essential. Use a balanced fertilizer every two weeks to provide necessary nutrients, encouraging strong growth and vibrant blooms. Be mindful not to over-fertilize, as this can harm your plants.
Regular pruning is vital to remove dead or dying flowers and leaves, promoting new growth and preventing diseases. Use clean, sharp scissors or pruning shears to avoid damage.
Monitor for pests such as aphids or snails. Treat infestations promptly using safe, natural remedies or insecticidal soap to protect your plants without harming beneficial insects.
Finally, adjust your care routine with the seasons, altering water, and nutrient schedules as needed to match the growth rates and dormancy periods of your plants.
tips for watering effectively

Watering your window box plants effectively is crucial for their health. Begin by checking soil moisture regularly with your fingers. The soil should feel slightly damp, not too wet or too dry.
Water early in the morning to minimize evaporation and ensure plants have ample moisture throughout the day. Use a watering can with a narrow spout to direct water precisely at the soil base, avoiding foliage that can lead to mold.
Deep watering is essential for promoting robust root growth. Rather than frequent shallow watering, aim for a soak that penetrates the entire root system. This encourages roots to grow deeper into the soil.
Adjust your watering schedule with the seasons. In warmer months, you may need to water more often due to faster evaporation, while in cooler months, reduce the frequency to prevent overwatering.
decorating your window box creatively
Get creative with your window box decorations to enhance curb appeal and reflect your personal style. Start by choosing a theme or color scheme that complements your home’s exterior. Seasonal themes like autumn harvest or spring blooms add a lively touch.
Incorporate various textures by mixing flowers with foliage and ornamental grasses. This adds depth and dimension to your display. Consider adding miniature garden accessories like tiny birdhouses or ornamental stakes for a whimsical touch.
Lighting can also transform your window box. Using solar-powered LED lights or fairy lights provides a magical glow, especially in the evenings. Attach them to the box edge for a subtle highlight or nestle them among the plants for an enchanting effect.
Don’t hesitate to refresh your decorations with the seasons or special occasions. This not only maintains interest but also prolongs the life and vibrancy of your window box.
understanding soil needs and fertilizers
Choosing the right soil is crucial for the success of your window box plants. Look for a lightweight potting mix that retains moisture but also provides good drainage. Avoid using garden soil, as it’s often too dense and can lead to poor aeration.
Amend your potting mix with organic matter like compost to enhance nutrient content. Compost helps create a rich growing environment by adding essential nutrients that plants need to thrive. Consider including perlite or vermiculite to improve drainage and aeration further.
When it comes to fertilizers, a slow-release fertilizer can provide a steady supply of nutrients throughout the growing season. Alternatively, use liquid fertilizers every couple of weeks for a nutrient boost. Choose a balanced formula or one tailored to your plants’ specific needs.
Ensure fertilizers are applied according to instructions to prevent over-fertilization, which can damage plants. Pay attention to signs like yellowing leaves and stunted growth to adjust your feeding schedule accordingly.
budget-friendly plant options

Creating a stunning window box doesn’t have to break the bank. There are plenty of budget-friendly plant options that offer beauty and resilience. Annuals such as marigolds and petunias are inexpensive and provide vibrant color throughout the season.
Herbs like basil and mint are also cost-effective choices. They not only add lush greenery but also offer practical benefits for cooking. Look for perennial plants on sale that can last for several seasons, like hostas and sedums, which are reliable and low-maintenance.
Consider purchasing smaller-sized plants or seeds. This can significantly reduce costs and offers a rewarding experience as you watch them grow. Plant swaps with friends or neighbors provide another great way to diversify your selection without spending extra money.
Combining these strategies can help you create a window box that’s both beautiful and budget-conscious.
color schemes that work best
Choosing the right color scheme for your window box can enhance its visual appeal and complement your home’s exterior. Start with a monochromatic scheme if you want a cohesive and elegant look, using variations of a single color. Shades of purple, for example, range from lavender to deep violet, providing subtle beauty.
For a more vibrant display, consider complementary colors that sit opposite each other on the color wheel, like blue and orange or yellow and purple. These combinations create striking contrast and grab attention.
Analogous color schemes use colors that sit side-by-side on the color wheel, such as yellow, orange, and red. This harmonious blend works well for a serene, unified appearance. Choose plants with various flower colors and foliage to add depth and interest.
Whichever scheme you choose, ensure the colors complement your home’s exterior without clashing. Test a few plant arrangements before finalizing your design to see how they work together in different lighting conditions.
how to build a simple wooden box
Building a simple wooden box for your window plants is easier than you think. Start by selecting durable wood like cedar or redwood, which are resistant to rot and weather damage. You’ll need wood boards cut to size: two for the sides, one for the bottom, and shorter ones for the ends.
Use a drill and screws to attach the side pieces to the bottom. Make sure the edges align perfectly to create a sturdy structure. Attach the end pieces last, sealing the edges tightly.
For proper drainage, drill small holes in the bottom board to allow water to escape, preventing root rot. Sand the edges and surfaces for a smooth finish, reducing the risk of splinters and making the box safe to handle.
Finally, apply a sealant or outdoor paint to protect the wood from moisture and UV rays, offering both durability and an attractive look. Customize it by adding brackets or hooks to secure it to your window frame or railing.
metal versus plastic: which is better?

When choosing between metal and plastic window boxes, consider factors like durability, aesthetics, and climate suitability. Metal boxes, often made from galvanized steel or aluminum, offer durability and can withstand harsh weather. They also provide a modern, sleek look that’s perfect for contemporary homes.
However, metal can be prone to rust if not properly treated and may heat up under direct sunlight, potentially harming plant roots. To mitigate this, ensure your metal box has a quality coating or liner to protect against corrosion and heat.
Plastic window boxes are lightweight, making them easy to install and move. They come in a variety of colors and styles, mimicking the look of more expensive materials like terracotta or stone. Plastic is less susceptible to heat, retaining moisture longer to benefit plants during hot seasons.
While generally more affordable, plastic boxes can fade or crack over time due to UV exposure, so choose UV-resistant plastics. Ultimately, your decision may depend on aesthetic preference, maintenance levels, and your local climate conditions.
incorporating herbs for functional beauty
Incorporating herbs into your window box adds both beauty and functionality. Herbs like basil, mint, and parsley offer lush greenery while being readily available for culinary uses. To add visual interest, mix taller herbs such as rosemary with trailing varieties like thyme.
Select herbs that thrive in your climate and match the sunlight available to your window box. For a splash of color, consider flowering herbs like chives or lavender, which produce beautiful purple blooms and attract pollinators.
Plant herbs in a well-draining potting mix to prevent root rot. Regularly trim herbs not only to encourage growth but also to keep them from overtaking other plants in the box. This approach ensures a balanced and thriving window box.
Experiment with different arrangements by combining culinary herbs with edible flowers such as nasturtiums, which add both taste and aesthetics to your space.
tips for pest management
Effective pest management is crucial for maintaining healthy window box plants. Start by regularly inspecting plants for signs of pests like holes in leaves or discolored spots. Early detection can stop small issues from spreading.
For a natural approach, introduce beneficial insects like ladybugs, which control aphid populations. You can also use neem oil or insecticidal soap, which are gentle on plants but effective against many common pests.
Maintaining good air circulation reduces the risk of fungal diseases. Space plants properly and prune any overgrown foliage that might block airflow.
Ensure your soil has proper drainage to prevent root rot and other issues that attract pests. If an infestation occurs, isolate infected plants to prevent it from spreading to healthy ones.
Rotate plant types each season to minimize repeat pest problems. Certain pests may return if they consistently find the same food source.
diy tools required for beginners

For beginners looking to embark on DIY window box projects, having the right tools makes all the difference. A measuring tape is essential for ensuring precise cuts and a perfect fit for your window space. Use a pencil to mark measurements on the wood.
A handsaw or a power saw will be necessary for cutting wood to size. If you’re new to using saws, start with a handsaw for more control. A cordless drill with a selection of drill bits for different materials comes in handy for assembling your window box and making drainage holes.
Sandpaper or a sanding block is necessary to smooth out rough edges, preventing splinters and ensuring a nice finish. For painting or sealing your wooden box, have a set of paintbrushes and an outdoor sealant or paint.
Lastly, look for safety gear like gloves and safety glasses to protect yourself while working. Start with these basic tools to successfully complete your DIY projects with confidence.
how to incorporate lighting elements
Incorporating lighting elements into your window box can transform it from a daytime feature to a stunning nighttime display. Start by selecting solar-powered LED lights for an eco-friendly option. These lights charge during the day and illuminate automatically at dusk.
Consider using string lights to weave throughout the plants, creating a soft, fairy-tale effect. Alternatively, spotlights can highlight specific plants or features within the window box. For a subtle glow, place small lanterns at either end of the box.
Focus on waterproof fixtures and materials that can withstand the elements. Ensure your installation does not obstruct plant growth or maintenance. Aim for a balanced distribution of light to enhance the natural beauty without overpowering it.
Experiment with different placements to find the most captivating arrangement, whether it’s subtle illumination or a bold statement. This will add another dimension of charm to your home’s exterior.
common mistakes to avoid
Avoiding common mistakes can ensure your window box thrives. First, don’t overcrowd plants. It may look full initially, but overcrowding limits growth and airflow, leading to disease. Allow space for roots to expand and air to circulate.
Ensure proper drainage by drilling holes in the box’s bottom. Without drainage, waterlogged soil can cause root rot. Avoid using garden soil, which is too dense; instead, opt for a lightweight potting mix.
Don’t neglect sunlight requirements. Some plants need full sun, while others prefer shade. Group plants with similar light needs to maintain health and color.
Avoid over-fertilizing. Too much can burn roots and stunt growth. Follow recommended dosages and schedules to promote healthy development.
Regularly remove dead leaves and spent flowers to encourage new growth and prevent pest infestations. This small task keeps plants vibrant and productive.
Making the Most of Your DIY Window Box
Creating a window box can transform your space into a vibrant display of nature’s beauty. By focusing on design, plant selection, and proper care, your window box will thrive in all seasons.
Remember to plan your color schemes and incorporate elements like lighting for both day and night appeal. Choose durable materials and maintain a regular care routine to keep your plants healthy.
Avoid common pitfalls by giving attention to drainage, space, and sunlight. These simple steps ensure your window box remains lush and stunning, adding charm and style to your home.
Now it’s time to get started and watch your creativity bloom!


