
DIY natural soap involves using oils, lye, water, and natural additives to create skin-friendly, eco-conscious soap bars through careful mixing, curing, and customization.
DIY natural soap might seem tricky at first, but it’s actually a rewarding craft anyone can try. Curious how to turn simple ingredients into beautiful soaps? Let’s break it down in an easy, practical way just for you.
What is natural soap and why choose it
Natural soap is made from oils, fats, and natural lye without synthetic chemicals. Unlike commercial soaps, it retains glycerin, which moisturizes skin and avoids harsh irritation. Choosing natural soap means opting for a product that’s gentle and eco-friendly.
Key characteristics of natural soap
Natural soaps use ingredients like olive oil, coconut oil, shea butter, and essential oils. They are often scented with natural fragrances derived from plants and herbs. This creates a soothing, nourishing experience that benefits sensitive and dry skin types.
Why choose natural over commercial soaps?
Many commercial soaps contain detergents and artificial additives that can strip skin of moisture. Natural soaps maintain a balance that supports skin’s natural oils. This helps keep your skin soft, hydrated, and healthy-looking without exposure to potentially harmful chemicals.
In summary, natural soap is a sustainable choice that benefits both your skin and the environment. It’s a simple switch with big rewards for those wanting a cleaner, greener lifestyle.
Essential ingredients for homemade natural soap
Making natural soap starts with understanding the essential ingredients that create a gentle and effective product. The foundation is oils and fats like olive oil, coconut oil, and shea butter. Each oil brings unique properties: olive oil offers moisturizing benefits, coconut oil adds lather and cleansing power, and shea butter nourishes the skin with vitamins.
Lye: The key to soap making
Lye, or sodium hydroxide, reacts with oils in a process called saponification to turn fats into soap. Using the correct amount is crucial for safety and quality. Always measure lye precisely and handle it with care.
Water and liquids
Water is combined with lye to activate it. Some recipes swap water with natural liquids like herbal tea, milk, or aloe juice to add extra skin benefits and create unique textures.
Natural additives
Adding natural additives can enhance your soap’s aroma and appearance. Popular options include essential oils for fragrance, dried herbs or flowers for texture and decoration, and natural colorants like turmeric or cocoa powder.
Careful selection of these ingredients ensures your homemade soap is both beautiful and skin-friendly, making the process enjoyable and rewarding.
Step-by-step process to make natural soap

Making natural soap involves several important steps that ensure safety and quality. Start by gathering your ingredients and equipment, including oils, lye, water, molds, and a heat-safe container.
Step 1: Prepare the lye solution
Slowly add lye to water (never the other way around) in a well-ventilated area. Stir carefully until dissolved and allow it to cool. Always use gloves and goggles for protection.
Step 2: Heat the oils
Warm your oils in a pot until they reach the right temperature, usually around 100-110°F (38-43°C). Matching the temperature of both lye solution and oils is key for successful soap.
Step 3: Combine lye and oils
Slowly pour the cooled lye solution into the warm oils. Use a stick blender to mix until the mixture reaches “trace” – a pudding-like thickness. This shows saponification has started.
Step 4: Add extras
At trace, add your chosen essential oils, natural colorants, or herbs. Mix gently but thoroughly to distribute ingredients evenly.
Step 5: Pour into molds
Transfer the soap mixture into molds. Cover and insulate them for 24-48 hours to allow the soap to harden.
Step 6: Cure the soap
Remove soaps from molds and let them cure in a dry, ventilated area for 4-6 weeks. This step improves hardness and allows excess water to evaporate.
Following these steps carefully helps you create beautiful, natural soap that’s safe to use and gentle on skin.
How to safely handle soap making materials
Working with soap making materials requires care and attention to safety. The most important material to handle carefully is lye (sodium hydroxide), which is caustic and can cause burns or irritation.
Wear protective gear
Always use safety goggles, gloves, and long sleeves to protect your eyes and skin. Avoid breathing in lye dust by working in a well-ventilated area or wearing a mask.
Measure precisely
Use a reliable scale to weigh lye and oils accurately. Improper measurements can cause soap to not saponify correctly or result in a dangerous mixture.
Mix carefully
When combining lye with water, always pour lye into water slowly to prevent splashes or heat reactions. Stir gently and avoid sudden movements.
Keep a clean workspace
Soap making areas should be well organized and free of clutter. Keep children and pets away while handling materials.
Store materials safely
Keep lye and other ingredients in labeled, sealed containers away from moisture and out of reach of children.
Following these safety steps ensures a safe and enjoyable soap making experience without accidents or injuries.
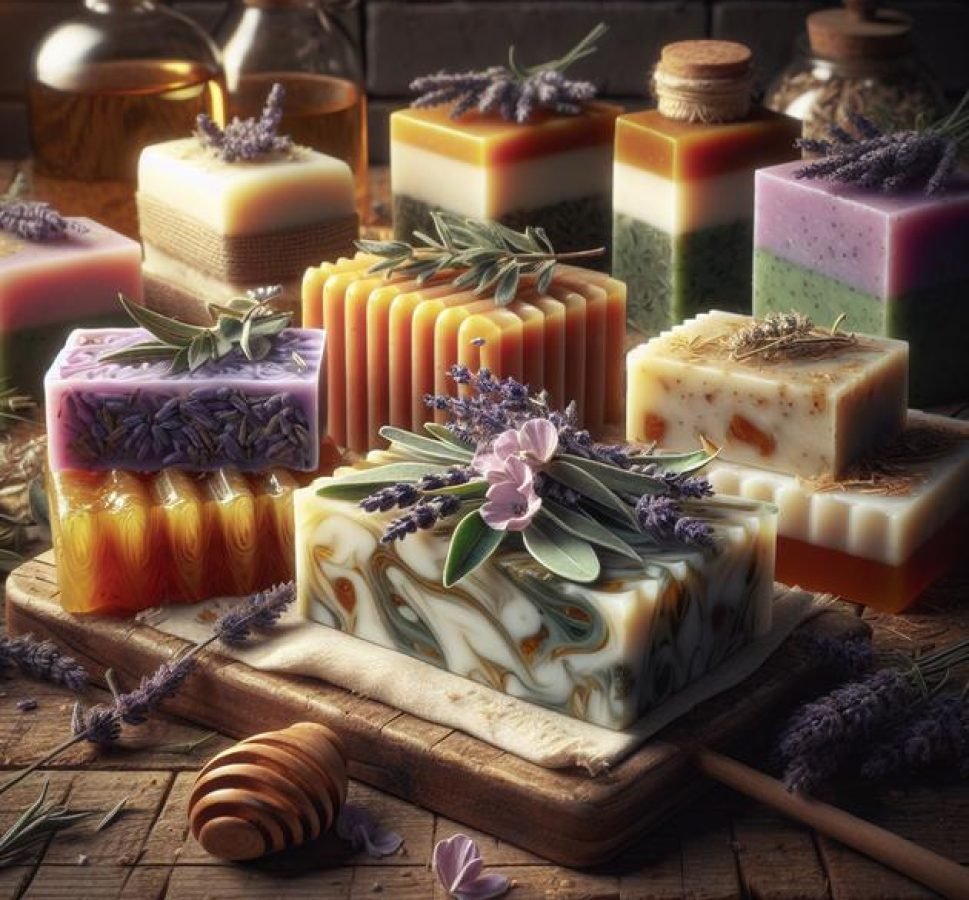
Customizing your soap with scents and colors
Customizing your soap allows you to create unique bars that suit your preferences and skin needs. Essential oils are the most popular way to add scent. Popular choices include lavender, peppermint, and citrus oils, each bringing a pleasant aroma and extra skin benefits.
Adding natural colors
Natural colorants like turmeric, spirulina, or beetroot powder can tint your soap with beautiful, gentle hues. Avoid synthetic dyes as they may irritate skin.
Using dried herbs and flowers
Incorporate dried lavender buds, rose petals, or chamomile for texture and visual appeal. These also enhance the natural fragrance.
Adjusting scent strength
You can control how strong your soap smells by adjusting the amount of essential oil. Start with small amounts and test as you go to avoid overpowering scents.
Experimenting with scents and colors makes soap making fun and personal. Always patch-test new ingredients to check for skin reactions and follow recommended usage rates for safety.
Benefits of using natural soap for your skin

Natural soap offers many benefits for your skin compared to commercial soaps. It is made with gentle, nourishing ingredients that preserve your skin’s natural oils and moisture.
Moisturizing and nourishing
Unlike harsh soaps, natural soap contains glycerin, a natural byproduct of saponification, which helps keep skin soft and hydrated. Ingredients like olive oil and shea butter add extra nourishment.
Gentle on sensitive skin
Natural soaps avoid synthetic chemicals, detergents, and artificial fragrances that can irritate or dry out sensitive skin. This makes them ideal for people with allergies or skin conditions like eczema.
Rich in antioxidants
Many natural soaps include ingredients rich in antioxidants, such as herbs, essential oils, and plant extracts. These help protect skin from damage caused by free radicals and environmental stress.
Eco-friendly and safe
Using natural soap benefits not only your skin but also the environment. They are biodegradable and made from renewable resources without harmful chemicals.
Overall, natural soaps support healthy, balanced skin by providing cleansing without stripping away essential moisture or causing irritation.
Common mistakes to avoid in soap making
Many beginners make avoidable mistakes when making natural soap. Recognizing these can save time and ensure better results.
Incorrect lye measurements
Using too much or too little lye can ruin your soap. Too much lye makes soap harsh and irritating, while too little results in soft, oily bars. Always use a precise scale and soap calculator.
Not matching temperatures
Combining lye and oils at very different temperatures can cause separation or uneven saponification. Aim to mix both around 100-110°F for best results.
Rushing the curing process
Soap needs 4-6 weeks to cure and harden properly. Using it too soon results in soft bars that dissolve quickly.
Skipping safety precautions
Neglecting gloves, goggles, or proper ventilation can lead to burns or respiratory irritation. Safety gear is mandatory when handling lye.
Adding additives too early or late
Essential oils, colorants, and herbs should be added at the right time, usually at trace. Too early or late addition affects texture and scent.
Avoid these errors to create safe, beautiful soap that lasts and feels great on the skin.
Tips to store and preserve your natural soap
Proper storage and preservation extend the life and quality of your natural soap. Since natural soaps contain glycerin, they can attract moisture and dissolve faster if not stored correctly.
Keep soap dry between uses
Use a soap dish with good drainage to prevent bars from sitting in water. This helps soap dry completely and last longer.
Store in a cool, dry place
Keep extra bars away from humidity and direct sunlight. A cool, ventilated cupboard or drawer is ideal to preserve scent and texture.
Wrap soap for long-term storage
Wrapping soap bars in breathable materials like wax paper or parchment helps maintain moisture balance while protecting them from dust.
Avoid airtight containers
Airtight containers can trap moisture and soften soap. Instead, allow airflow to keep bars firm and durable.
Following these tips ensures your natural soap stays fresh, fragrant, and effective for much longer.
Wrapping Up Your Natural Soap Journey
Making natural soap at home is a fun and rewarding experience that lets you control every ingredient. By following safe practices and customizing scents and colors, you create unique, skin-friendly bars.
Remember to avoid common mistakes and store your soap properly to enjoy its benefits longer. With patience and creativity, you can craft beautiful soaps that nourish your skin and support a greener lifestyle.


